

Quick Tip: How to Reduce Gloss Ink Density in VersaWorks
If you’ve ever printed a job and felt that the Gloss ink was a bit too strong or overpowering, you’re not alone. Many users run into situations where the file was created with a Gloss layer in Illustrator or CorelDRAW, but the printed result ends up shinier than intended.
The good news? You can control and reduce Gloss ink levels directly inside Roland VersaWorks—without modifying the original design file.
Below are two quick and effective methods to help you dial in the perfect amount of gloss for your prints.
Method 1: Use the Gloss Color Slider (Quick & Easy)
This method works great for simple or moderate reductions.
Step 1: Load Your Job
Open VersaWorks and load your print file containing CMYK + Gloss.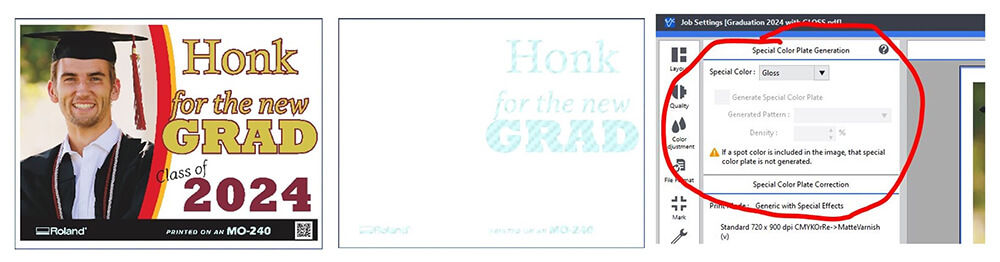
Step 2: Adjust the Gloss Slider
-
Navigate to the Color Adjustment tab.
-
Locate the Gloss (Gl) slider.
-
Move the slider to the left to reduce Gloss density.
Tip:
The adjustment range runs from -1 to -5, giving you a quick way to slightly tone down gloss levels without affecting the rest of the print.
Method 2: Edit the Tone Curves (Precise Control)
If Method #1 doesn’t give you the level of control you need, this option allows for fine-tuned, highly accurate adjustments.
Step 1: Load Your Job
Load the file in VersaWorks just as before.
Step 2: Open the Tone Curve Editor
Go to the Color Adjustment tab and click Edit Tone Curve.
A window will appear displaying independent tone curve controls for each ink channel.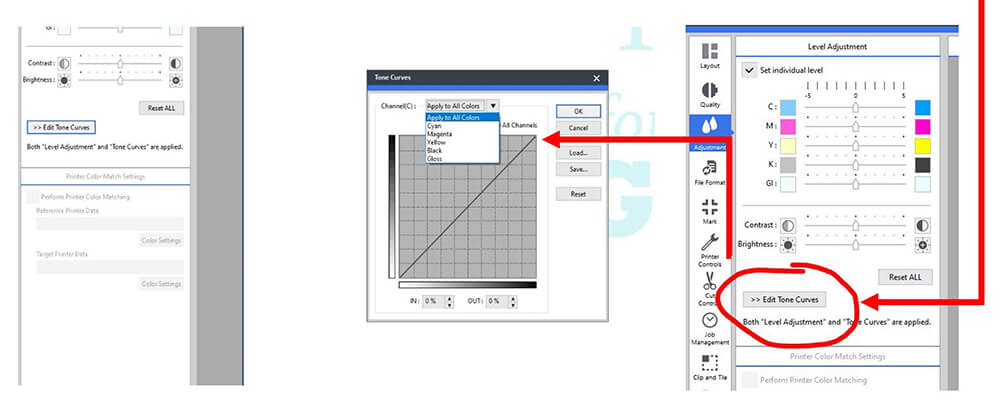
Step 3: Select the Gloss Ink Channel
Choose the Gloss channel from the list so you can edit its curve exclusively.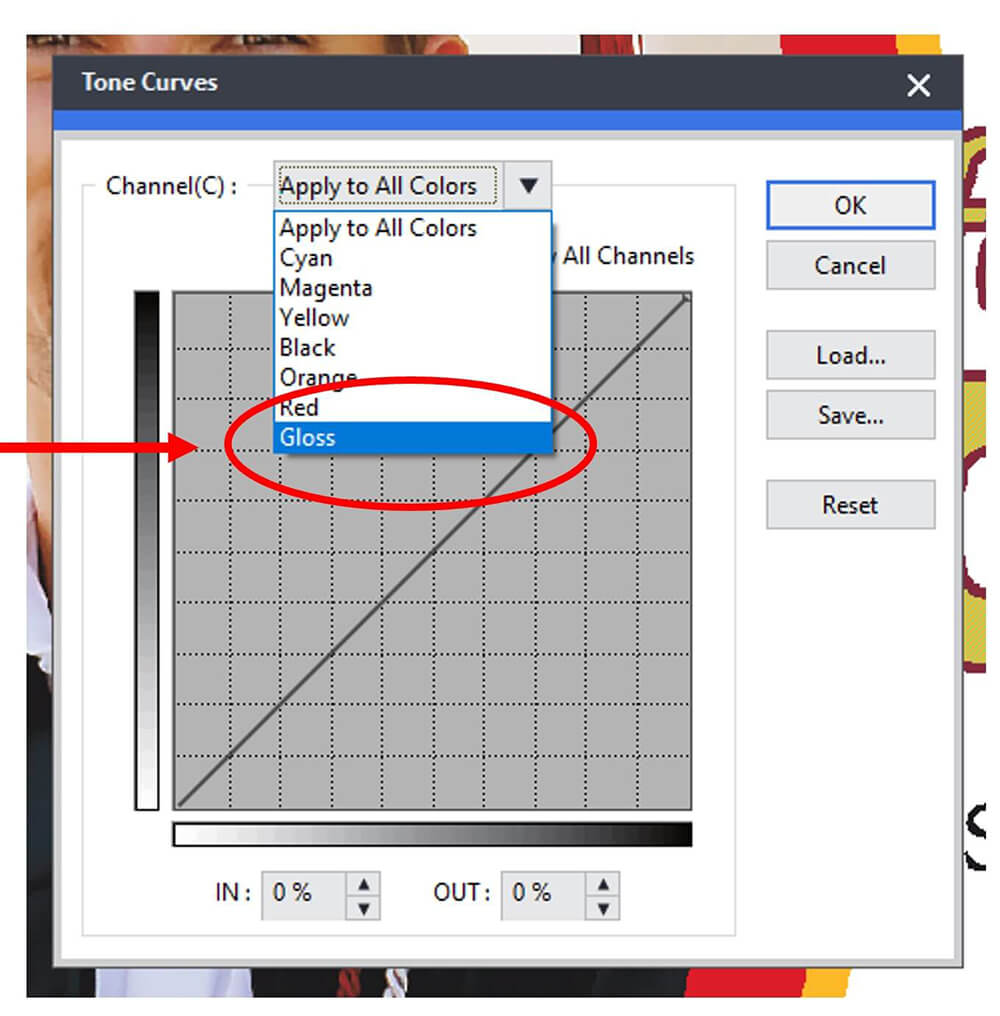
Step 4: Adjust the Curve
-
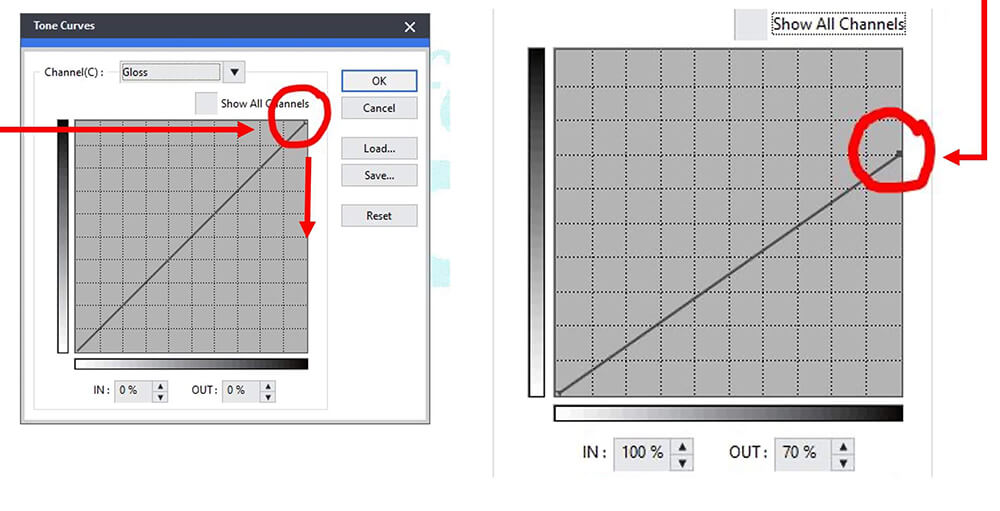
Find the top-right point of the Gloss curve (representing 100% density).
-
Click and drag it downward along the right edge.
-
This reduces maximum gloss output while retaining smooth tonal transitions.
-
Step 5: Test and Refine
For example, lowering the top point from 100% down to 70% gives a 30% reduction in Gloss volume.
Every printer, media type, and design is a little different—so experiment to find the perfect curve for your project.
Remember:
There’s no single “correct” curve. The goal is simply to achieve the visual effect you want.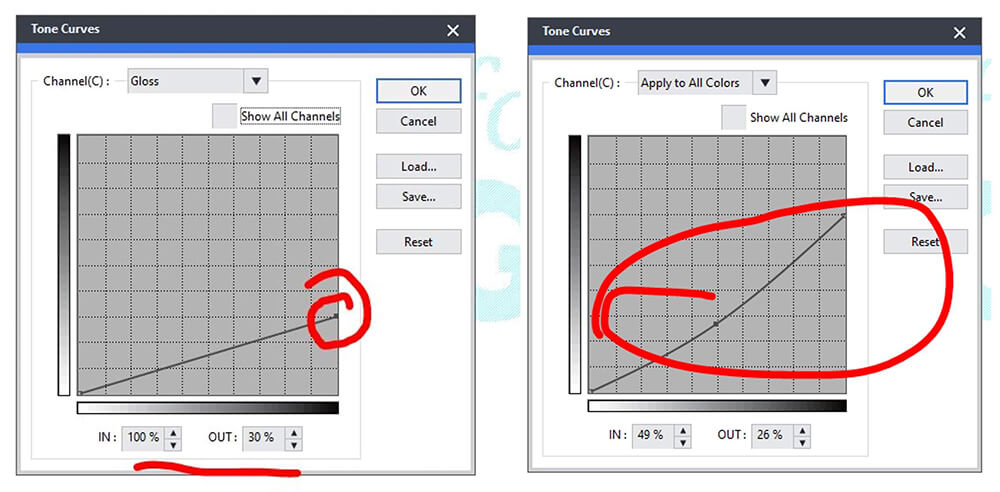
Controlling Gloss ink in VersaWorks is easier than many users realize. Whether you need a quick tweak or highly precise density control, these two methods give you the flexibility to perfect your print’s finish—without reopening or editing the original artwork.
If you found this helpful and want more VersaWorks tips, feel free to reach out or browse additional resources at gpisupplies.com.
Recent Articles

Understanding Mimaki's UV Ink Differences
Subscribe to Media Posts
Recommended for You


$265.00


$190.00


